When the forecast shows a nor’easter heading toward the Jersey Shore, most of us start thinking about bread, milk, and whether we have enough salt for the driveway. Your roof probably isn’t top of mind — until something goes wrong.
The reality is that snow storms put serious stress on residential roofs. Heavy snow loads, ice dam formation, wind-driven precipitation, and the freeze-thaw cycles that follow can expose weaknesses that weren’t obvious before the storm hit. A few simple preparations beforehand and a quick inspection afterward can mean the difference between catching a small problem early and dealing with major water damage in your living room.
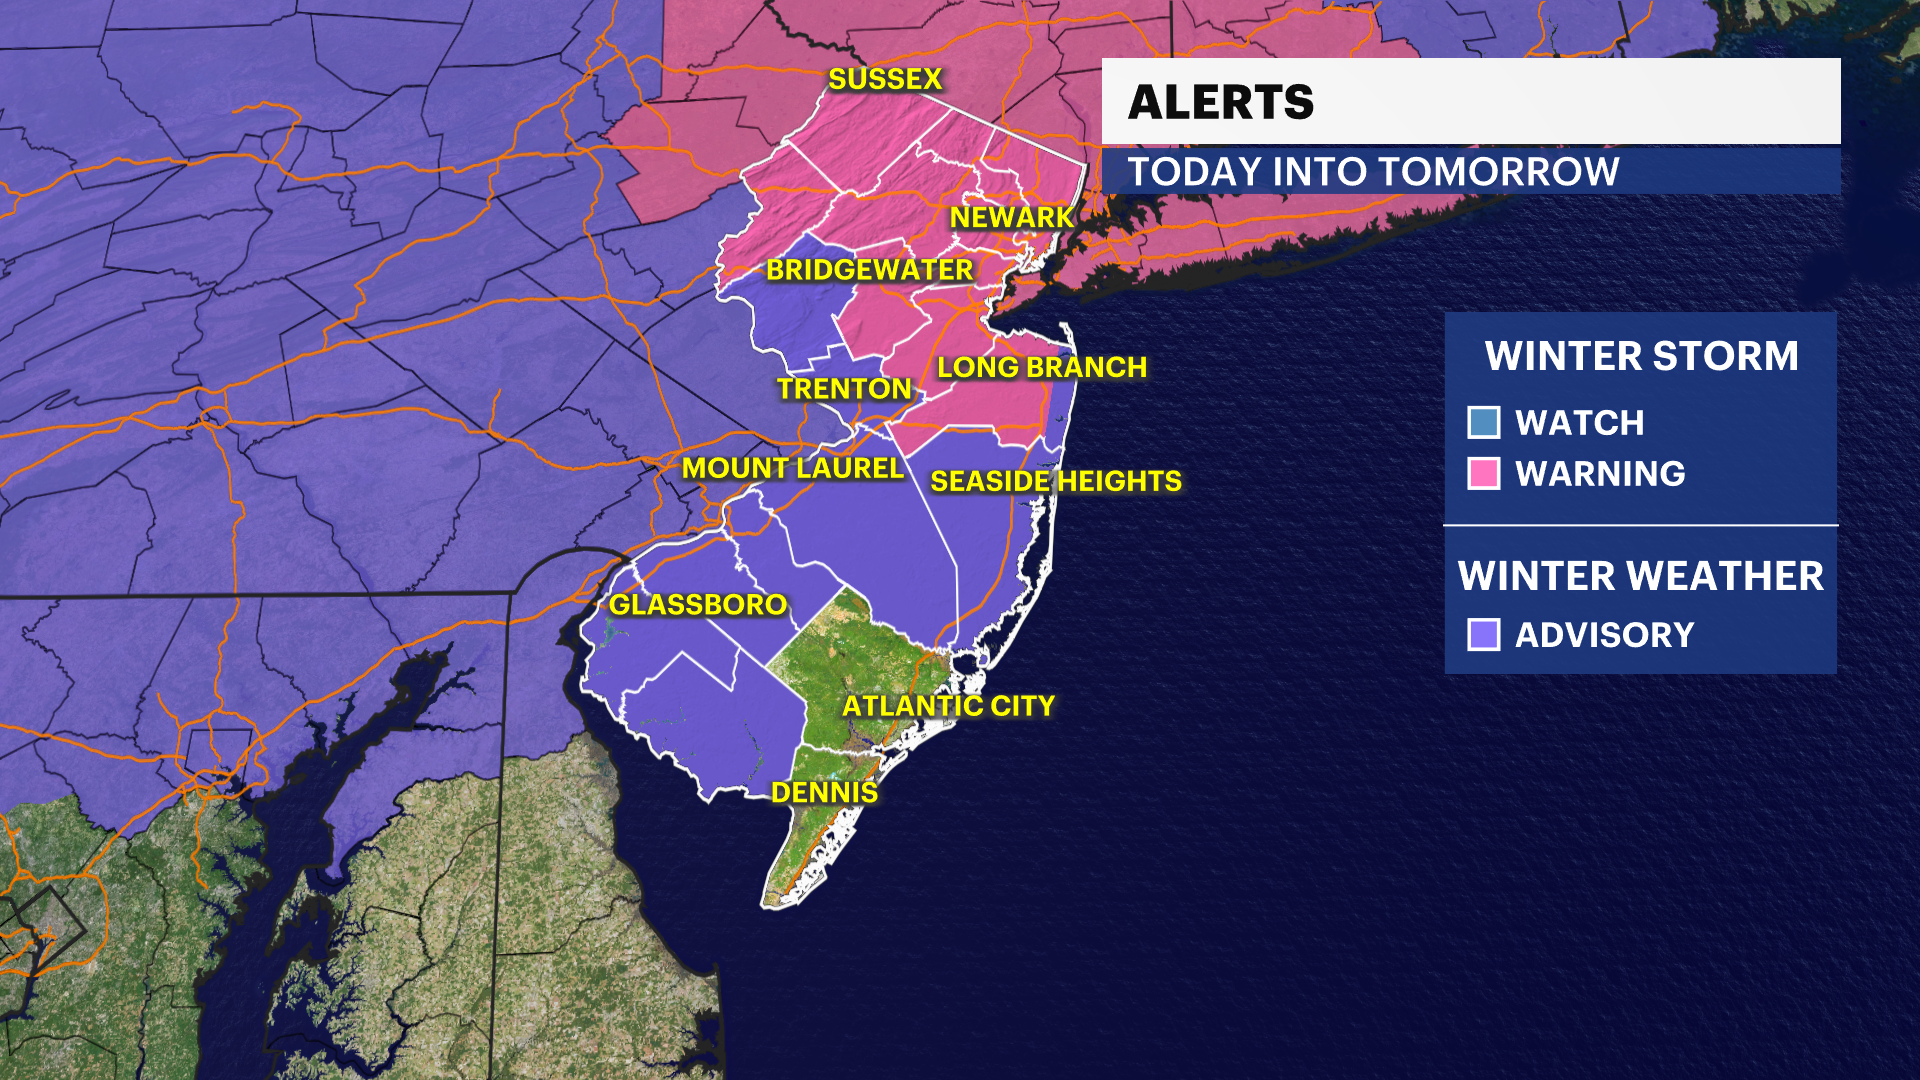
This checklist covers what homeowners throughout Jackson Township, Toms River, Freehold, and Central New Jersey should do before winter storms arrive — and what to look for once the snow stops falling.
What is a snow storm roof checklist for New Jersey homeowners?
A snow storm roof checklist helps New Jersey homeowners prepare their roof before a nor’easter and inspect for damage afterward. Before the storm, homeowners should clear gutters, trim overhanging branches, check attic insulation, and inspect flashing around chimneys and vents. After the storm, inspect for missing shingles, ice dam formation, interior water stains, and any sagging or unusual roof lines. Addressing problems quickly prevents minor storm damage from becoming major repairs.
Understanding How Snow Storms Affect Your Roof
Before jumping into the checklist, it helps to understand what actually happens to your roof during a significant snow event.
Snow load is the most obvious concern. Fresh snow weighs roughly 3-5 pounds per square foot for every foot of accumulation. Wet, heavy snow — the kind we often get in coastal Monmouth and Ocean counties when storms pull moisture off the Atlantic — can weigh significantly more, sometimes 20+ pounds per square foot. Most residential roofs are engineered to handle these loads, but older homes, structures with previous damage, or roofs with existing structural concerns can be at risk.
Ice dams form when heat escaping from your living space melts snow on the upper portions of your roof. That meltwater runs down toward the eaves, where it refreezes because the roof edge is colder (it’s not warmed by escaping heat). Over time, this creates a ridge of ice that traps additional meltwater behind it. That trapped water can back up under shingles and leak into your home.
Wind damage during nor’easters can lift shingles, damage flashing, and drive snow and ice into gaps that would normally stay dry during regular rainfall. The combination of high winds and heavy precipitation is particularly hard on roofs.
Freeze-thaw cycling continues long after the storm passes. As temperatures swing above and below freezing — something that happens constantly during New Jersey winters — ice expands and contracts in every crack and crevice. This gradually widens gaps, loosens fasteners, and breaks down sealants.
|
Question |
Brief Answer |
|
How much snow can a roof hold? |
Most NJ residential roofs handle 20-25 lbs per square foot. Fresh snow weighs 3-5 lbs/sq ft per foot of depth; wet snow weighs more. |
|
Should I shovel snow off my roof? |
Generally no — it’s dangerous and can damage shingles. Modern roofs handle normal snow loads. Only consider removal for flat roofs or extreme accumulation. |
|
How do I know if my roof is damaged after a storm? |
Look for missing shingles, bent flashing, ice dams, and interior water stains. Check your attic for moisture or daylight coming through. |
|
What temperature causes ice dams? |
Ice dams form when attic heat (above 32°F) melts roof snow while the eaves remain below freezing. Poor insulation and ventilation are the root causes. |
|
Does homeowners insurance cover snow damage to roof? |
Most policies cover sudden storm damage including wind, ice, and snow. Normal wear and aging are typically excluded. Document damage and file claims promptly. |
Before the Storm: Preparation Checklist
The best time to prepare for a snow storm is before the forecast even mentions one. Most of these items should be part of your fall maintenance routine, but if you haven’t gotten to them yet, a storm warning is your reminder.
Clear Your Gutters and Downspouts
Clogged gutters are one of the primary contributors to ice dam formation. When gutters are full of leaves and debris, meltwater can’t drain properly. It backs up, freezes, and creates exactly the conditions that lead to interior water damage.
Walk around your home and visually inspect your gutters. If you can see debris piling up over the edges, they need cleaning. Make sure downspouts are clear and directing water away from your foundation — frozen ground won’t absorb runoff the way it does in warmer months.
For homes in heavily wooded areas throughout Howell, Jackson, and parts of Freehold, gutter maintenance is an ongoing battle. If you’re constantly fighting leaf buildup, gutter guards might be worth considering as a longer-term solution.
Trim Overhanging Branches
Heavy snow and ice accumulation can snap tree branches that might otherwise seem perfectly healthy. Branches hanging over your roof become potential projectiles during storms — and even if they don’t break, they can scrape against shingles as they sag under the weight of snow and ice.
Look for any limbs within 10 feet of your roof surface. Dead branches are obvious hazards, but even living branches loaded with ice can cause problems. If you have significant tree coverage, a professional arborist can assess which limbs pose the greatest risk.
Inspect Your Attic Insulation and Ventilation
This one isn’t intuitive, but it directly affects ice dam formation. Proper attic insulation keeps heat inside your living space instead of letting it escape through the roof. Proper ventilation allows cold air to circulate under your roof deck, keeping the surface temperature consistent.
When insulation is inadequate or ventilation is blocked, warm spots develop on your roof. Snow melts unevenly, and ice dams form. Homeowners in older homes throughout Brick, Toms River, and Point Pleasant often discover their attics were never insulated to modern standards — something that becomes painfully obvious during the first major winter storm.
A quick attic inspection can reveal obvious problems: insulation that’s been disturbed or compressed, blocked soffit vents, or bathroom exhaust fans venting into the attic instead of outside (a common issue we’ve discussed before).
Check Flashing and Seals Around Penetrations
Anywhere something penetrates your roof — chimneys, plumbing vents, exhaust fans, skylights — is a potential entry point for water. The flashing and sealants around these penetrations take a beating during freeze-thaw cycles.
From the ground, look for obvious issues: flashing that’s lifted or bent, visible gaps around chimney bases, or sealant that’s cracked and deteriorated. You won’t catch everything from ground level, but obvious problems are worth addressing before a storm hits.
Know Your Roof’s Age and Condition
If your roof is relatively new and in good condition, it should handle normal snow loads without issue. If your roof is approaching the end of its lifespan — say, 20+ years for asphalt shingles in our climate — it’s more vulnerable to storm damage.
Knowing where you stand helps you calibrate your concern level. A five-year-old roof with no previous issues? Probably fine. A 25-year-old roof that’s already showing wear? Worth watching more closely during and after any significant weather event.
Document Your Roof’s Current Condition
Before storm season, take photos of your roof from multiple angles. Capture the overall condition as well as details around chimneys, vents, and other penetrations. If you do experience storm damage, these “before” photos can be invaluable for insurance claims.
You don’t need professional equipment — smartphone photos with good lighting work fine. Store them somewhere you’ll be able to find them later.
During the Storm: What You Can (and Can’t) Do
Once a storm is actively happening, your options are limited — and that’s okay. Trying to address roof problems during a nor’easter is dangerous and largely pointless.
Stay off your roof. This should be obvious, but people make bad decisions during stressful situations. No roof problem is worth risking a fall on snow-covered, icy surfaces.
Monitor from inside. Watch your ceilings for new water stains, especially around chimneys and in upper-floor rooms beneath roof penetrations. Check your attic if you can safely access it — look for daylight coming through, active dripping, or sudden moisture accumulation.
Note what’s happening outside. If you hear unusual sounds — cracking, scraping, heavy thuds — make a mental note. This information can help a contractor understand what happened during their post-storm assessment.
Don’t panic about snow accumulation. Modern residential roofs are designed to handle significant snow loads. Unless you have a flat roof, unusual structural issues, or are experiencing a truly historic accumulation, the snow itself isn’t an emergency. The problems typically come afterward, during melting and refreezing.
After the Storm: Inspection Checklist
Once conditions are safe — roads cleared, temperatures manageable, no ongoing precipitation — it’s time to assess what the storm did to your roof.
Ground-Level Visual Inspection
Start by walking around your entire home and looking up at your roof from every angle. You’re looking for:
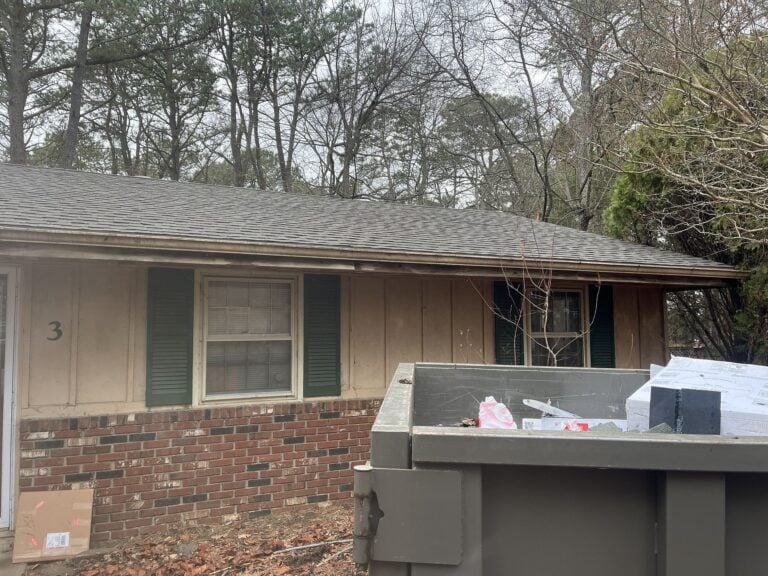
Missing or damaged shingles. Wind can lift, crack, or completely remove shingles. Look for obvious gaps, shingles that are askew, or pieces of roofing material on the ground or stuck in landscaping.
Damaged flashing. Metal flashing around chimneys, vents, and roof edges can get bent, lifted, or torn during high winds. Visible damage here means potential water entry points.
Ice dam formation. Look at your roof edges and gutters. Thick ridges of ice along the eaves — especially if you see icicles forming behind the ice ridge — indicate ice dam conditions that need monitoring.
Sagging or unusual roof lines. Compare what you’re seeing to your memory of how the roof normally looks. Any new dips, sags, or unevenness could indicate structural stress from snow load.
Debris accumulation. Branches, leaves, and other debris that landed on your roof during the storm should be noted. Large debris may need removal to prevent damage; smaller items typically wash off with rain.
Interior Inspection
Inside your home, check every room on the top floor plus your attic:
Ceiling stains. New brown or yellow discoloration indicates water intrusion. Even small stains should be investigated — they often indicate larger problems hidden above.
Damp spots on walls. Water doesn’t always drip straight down. It can travel along rafters and emerge on walls far from the actual entry point.
Attic moisture. With a flashlight, check for wet insulation, water droplets on surfaces, frost on the underside of roof sheathing, or any signs of active leaking.
Musty odors. Sometimes you’ll smell a problem before you see it. New musty or damp odors in upper floors can indicate hidden moisture.
What to Do If You Find Damage
If your inspection reveals obvious damage, document everything with photos before touching anything. This documentation is crucial for insurance purposes.
For active leaks, do what you can to minimize interior damage — buckets to catch drips, moving furniture and valuables away from affected areas, towels to absorb spreading water. But don’t attempt roof repairs yourself, especially while ice and snow are still present.
Contact a reputable roofing contractor as soon as possible. After major storms, quality contractors get booked quickly. Companies with established local presence — those serving Monmouth, Ocean, and Burlington counties year-round rather than storm chasers who appear after disasters — should be your first call.
If damage is significant, contact your homeowners insurance company to start the claims process. Your policy likely covers storm damage, but there are often time limits for filing claims and specific documentation requirements.
Ice Dams: Special Attention Required
Ice dams deserve extra focus because they’re so common in Central New Jersey and can cause significant damage if not addressed.
If you see ice dam formation on your roof, monitor it closely. Small ice ridges at the roof edge aren’t necessarily emergencies — they’re responding to the laws of physics, and minor ones often resolve without intervention as temperatures fluctuate.
However, if you notice interior water stains appearing below ice dammed areas, water dripping in your attic, or ice dams growing significantly larger, professional attention is warranted.
Don’t try to remove ice dams yourself with hammers, chisels, or ice picks. You’ll likely damage your shingles and potentially injure yourself. Professional ice dam removal uses specialized steaming equipment that melts the ice without harming roofing materials.
The long-term solution to recurring ice dams is improving attic insulation and ventilation — addressing the heat loss that causes uneven melting in the first place. If you experience ice dams every winter, that’s a sign your attic needs evaluation.
When to Call a Professional
Some post-storm situations clearly warrant professional assessment:
- Any visible structural damage or sagging
- Active leaks that can’t be traced to an obvious source
- Missing or severely damaged shingles covering a large area
- Flashing that’s been torn away or significantly bent
- Ice dams causing interior water damage
- Any concerns about your roof’s ability to handle additional storms
Even if you don’t see obvious damage, an annual professional inspection is worthwhile for roofs over 15 years old. Winter storms can accelerate existing wear patterns in ways that aren’t visible from the ground.
Building Long-Term Storm Resilience
Each winter storm is a test of your roof’s condition. Passing that test gets easier when you invest in proper maintenance and address small problems before they become big ones.
Regular gutter cleaning, proper attic insulation, timely repairs, and professional inspections all contribute to a roof that handles whatever New Jersey winters throw at it. And when your roof does eventually need replacement, quality installation by certified contractors — using materials designed for our climate — sets you up for decades of reliable performance.
Concerned about storm damage or want a professional assessment of your roof’s winter readiness? Contact Elegant Exteriors for a free inspection. We serve homeowners throughout Jackson Township, Toms River, Freehold, Howell, Brick, and communities across Monmouth, Ocean, and Burlington counties.